
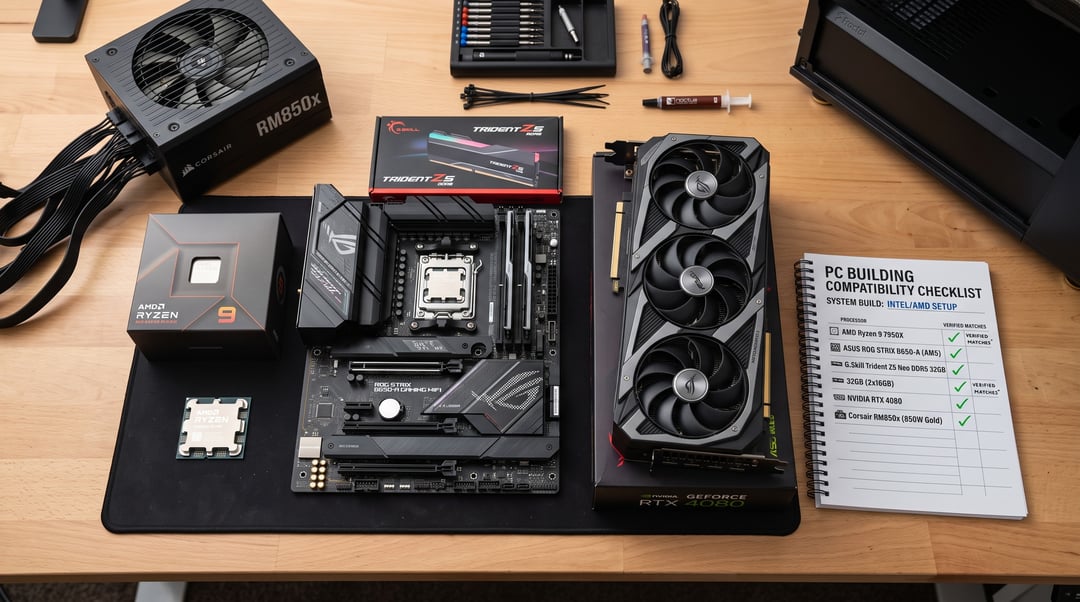
Buying parts for a new PC build only to discover they don't work together wastes time and money. Knowing how to check PC part compatibility before you order prevents returns, delays, and the frustration of troubleshooting hardware that was never going to fit or function in the first place.
The problem isn't just whether a CPU fits the motherboard socket. RAM speed and capacity limits, physical clearance inside the case, power supply connectors, cooler mounting brackets, and storage interface mismatches all cause builds to fail. Each component introduces constraints that ripple through the rest of the system.
This checklist walks through every compatibility checkpoint, from socket and chipset pairing to case dimensions and PSU wattage. By the end, you'll have a repeatable process for verifying that your chosen parts will work together before you spend a dollar.
CPU, motherboard, and socket compatibility
The CPU socket on your motherboard must physically match your processor. Intel currently uses LGA 1700 for 12th, 13th, and 14th gen chips, while AMD's Ryzen 7000 and 9000 series require AM5. Older AMD builds use AM4. If the socket doesn't match, the CPU won't fit.
Socket compatibility alone isn't enough. Chipset limitations matter even when the physical socket is correct. An Intel B760 board supports 12th and 13th gen CPUs despite sharing the LGA 1700 socket, but a B660 board may refuse to work with 13th gen chips without a BIOS update. AMD's X670 and B650 chipsets both use AM5, yet feature sets differ.
Check the motherboard manufacturer's CPU support list before buying. These lists live on the product page under specifications or support sections. The list shows which CPU models work and which BIOS version each requires.
Newer CPUs on older boards often need a BIOS update before installation. Some motherboards support BIOS flashing without a CPU installed, but many require an older compatible CPU to boot and flash the update first.
RAM compatibility: speed, capacity, and type
RAM generation must match the motherboard exactly. DDR4 and DDR5 modules use different notch positions and pin counts, so a DDR5 stick will not physically fit into a DDR4 slot. Check your motherboard specifications to confirm which generation it accepts.
Next, verify the motherboard's maximum RAM capacity and the number of slots available. A board with four slots and a 128GB limit can accept four 32GB sticks, but installing more capacity than the limit will cause instability or prevent the system from booting.
RAM speed depends on both the motherboard and CPU. If your motherboard supports DDR4-3600 but your CPU only handles DDR4-3200, the RAM will run at 3200MHz. Installing faster RAM than either component supports wastes money since the system will downclock it automatically.
Check whether the motherboard supports dual-channel or quad-channel memory. Most consumer boards use dual-channel, which requires installing RAM in matched pairs (same capacity and speed) in specific slots to achieve optimal bandwidth. Quad-channel boards, common on HEDT platforms, need four matched sticks.
Physical clearance: case, GPU, and cooler dimensions
Check your case specifications for maximum GPU length before buying a graphics card. Many mid-tower cases list a GPU clearance around 320-370mm, but removing front-mounted drive cages can add 50-80mm of space. Measure from the rear PCIe bracket to any obstruction, not just to the front panel.
CPU cooler height is equally critical. Cases typically support coolers between 155mm and 170mm tall, while large tower air coolers can reach 165mm. Manufacturers list cooler height in product specifications, so compare directly against your case's clearance spec. Also check whether your chosen air cooler blocks the first RAM slot. Some models overhang slots one and two, requiring you to install memory in slots three and four instead.
Large coolers can also interfere with the top PCIe slot on smaller motherboards. If your cooler extends past the CPU socket area, verify that your GPU will still fit in the primary x16 slot.
Finally, confirm your motherboard form factor matches the case. ATX boards need ATX-compatible cases, though ATX cases also accept Micro-ATX and Mini-ITX. Smaller cases may only support their exact size.
Power supply and storage interface compatibility
Start by adding up the TDP of your CPU and GPU, then add roughly 100W for the motherboard, RAM, storage, and fans. Choose a PSU rated at least 20% above that total to avoid running near maximum capacity, which reduces efficiency and longevity. A system pulling 400W under load needs at least a 500W PSU.
Check that your PSU has the right connectors. CPUs need either a single 8-pin or a 4+4-pin EPS connector. Mid-range and high-end GPUs require one or more PCIe power connectors: 6-pin, 8-pin, or the newer 12VHPWR standard on RTX 40-series cards. Count your SATA drives and RGB controllers to confirm you have enough SATA or Molex connectors.
For storage, verify that your motherboard's M.2 slots support NVMe if you're buying an NVMe drive. Some slots only support SATA M.2 drives. Check whether populated M.2 slots disable specific SATA ports, a common bandwidth-sharing limitation. Finally, confirm the slot accepts your drive's physical length: most drives are 2280 (80mm), but shorter 2260 or 2242 variants exist.
Check socket and chipset first, then verify clearance and power
Start with the CPU and motherboard socket match, then verify chipset support on the manufacturer's CPU compatibility list. That step catches most showstoppers early. Next, confirm your RAM generation and speed work with both the motherboard and CPU, and check physical clearance for your GPU length, cooler height, and case dimensions before ordering. Finally, add up your components' power draw and verify your PSU has the right connectors, especially PCIe power for your GPU and the correct M.2 slot type for your storage. If you're reusing an older motherboard with a new CPU, check whether a BIOS update is required and plan to install it before swapping the processor.