
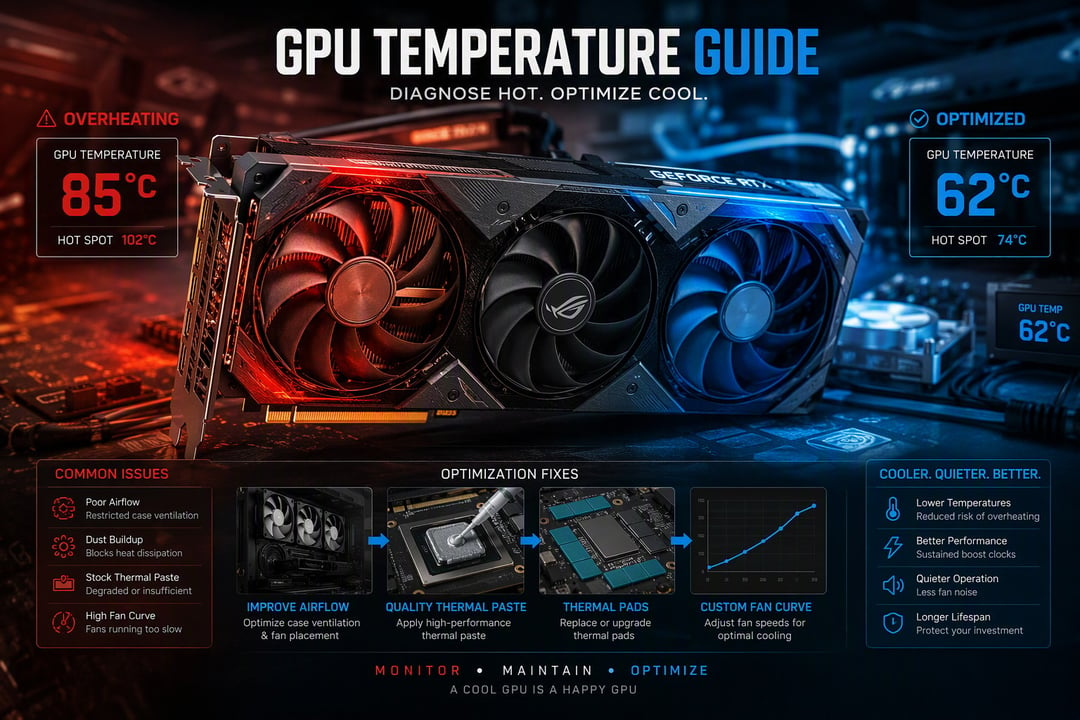
Your graphics card is running hotter than expected, with loud fans, reduced performance, or sudden shutdowns becoming part of your gaming routine. GPU Running Hot? Causes and Temperature Optimization starts with identifying whether the issue is blocked heatsinks, clogged filters, restricted case airflow, or poorly positioned fans. Aggressive fan curves and failing GPU fans can also limit cooling, while overclocking, overvolting, and elevated power limits create additional heat. High room temperatures, poor PC placement, uncapped workloads, troublesome drivers, and demanding software settings may push temperatures even higher. For older hardware, dried thermal paste or poor cooler contact could be the underlying cause. By the end, you’ll be able to diagnose the source, improve airflow, tune settings, and cool your GPU more effectively.
1. Dust-Blocked Heatsinks and Air Filters
Dust packed between GPU heatsink fins insulates them; dirty fans, case filters, and intake/exhaust vents also reduce airflow across the fins. A card may run hotter, throttle, or produce unusually loud fan noise under a familiar workload.
Power down the PC, switch off the PSU, unplug it, and press the power button briefly to discharge residual power. Move it to a ventilated area, hold each fan blade still with a plastic tool, and use short compressed-air bursts from several inches away. Blow through the GPU heatsink, then clean filters and vents; avoid vacuum contact and moisture.
Clean filters monthly and inspect the GPU every few months, sooner in dusty rooms. Visible mats, rising temperatures, or rapid fan ramping indicate blockage. Clean first, before software tuning or hardware replacement.
2. Restricted Case Airflow and Poor Fan Placement
Insufficient intake or exhaust airflow traps heat around the graphics card, making it draw warmer air repeatedly. Aim for a front-to-back path: front fans intake cool air, the rear fan exhausts it, and top fans usually exhaust rising heat. With bottom intakes, they can feed the GPU directly while rear and top exhaust preserve upward flow.
Remove dust filters, drive cages, or brackets blocking vents. Correct reversed fan orientation, route cables behind the motherboard tray, and add compatible PWM fans where mounts permit. To separate case airflow from a GPU cooler problem, record temperature under the same workload, then briefly open the side panel. A substantial drop implicates the case; little change points toward the GPU cooler.
3. Aggressive Fan Curves and Failing GPU Fans
Zero-RPM modes intentionally stop fans at light loads, while a conservative curve may delay higher speeds until the GPU is already hot. Dust-packed or blocked blades and worn bearings create the same problem: inadequate airflow, rising temperatures, or unstable fan operation. Use HWiNFO64, GPU-Z, or MSI Afterburner to watch GPU temperature, fan RPM/percentage, clock speed, and whether fan behavior matches the curve during a repeatable game load. Create a gradual curve rather than an abrupt maximum: for example, 30% at 50°C, 50% at 65°C, 70% at 75°C, and 85% at 82°C. Adjust after testing, balancing lower temperatures against noise and bearing wear. Stop using the card if a fan stays still, grinds, rattles, or reports erratic RPM; arrange professional repair or replacement.
4. Overclocking, Overvolting, and Excessive Power Limits
Higher core clocks increase switching activity, while higher voltage increases heat dissipation; raising the power limit lets the GPU sustain both longer. That reduces thermal headroom and can cause louder operation or thermal throttling. As a first diagnostic step, restore the manufacturer’s stock profile, including memory clocks and any undervolt settings, then compare temperatures under the same workload. Save the original profile first.
For safer tuning, change one setting at a time:
- Apply a modest undervolt within manufacturer-supported controls.
- Lower the power limit slightly or reduce the core clock by a small increment.
After each change, run a demanding game or repeatable benchmark and check for crashes, driver resets, flickering, or corrupted textures. Avoid voltage changes beyond supported ranges.
5. High Ambient Temperature and Poor PC Placement
Room temperature sets the GPU’s starting point: the same system that reaches 72°C in a 22°C room may approach 80°C when the room is 30°C, even with identical workload and fan settings. Keep the case away from walls, enclosed cabinets, radiators, and direct sunlight. Leave every intake and exhaust vent unobstructed; a rear panel pressed against a wall can trap the warm exhaust that the GPU needs to expel. Improve room ventilation or use air conditioning to lower the heat entering the case instead of relying solely on higher GPU fan speeds, which add noise while circulating already-warm air. For meaningful comparisons, record room temperature and compare GPU core and hotspot readings during the same game scene, benchmark duration, resolution, and power setting. A hotter room should be considered before treating the temperature increase as a hardware fault.
6. Uncapped Workloads, Drivers, and Software Settings
An uncapped game can render 300 FPS in a menu, keeping the GPU near 100% even when your monitor shows 144 Hz. Maxed ray tracing, stress tests, and background GPU work—browser video, launchers, cryptocurrency miners, or recording tools—can produce the same sustained load. Use an in-game limiter near your display’s refresh rate, enable G-Sync/FreeSync (adaptive sync), or reduce expensive settings such as ray-traced reflections when maximum FPS is unnecessary.
Check Task Manager’s Processes tab, sort by GPU, and inspect the Performance tab for sustained utilization. Tools such as HWiNFO or GPU-Z can identify the active engine and temperature; close unexpected browsers, launchers, or miners. If overheating started after a game, driver, or utility change, update the driver or perform a clean installation. Drivers can correct software behavior, but rarely fix a physical cooling problem.
7. Dried Thermal Paste, Poor Cooler Contact, or Aging Hardware
Dried thermal paste can lose contact with the GPU die; compressed or degraded thermal pads can isolate memory and VRM areas from the heatsink. A loose mount or warped, corroded heatsink similarly reduces heat transfer, pushing core or hotspot temperatures higher.
At stock settings, compare both readings in the same workload. A core near 75°C with a hotspot around 100°C may suggest uneven contact or failing interface material, but no temperature gap proves it: workload, sensor placement, and firmware also affect readings.
Check warranty status before removing the cooler. Use manufacturer service while covered, or a qualified repair shop to replace paste and pads and inspect mounting. Replacement is more practical if overheating persists at stock settings after cleaning, improving airflow, and verifying fan operation.
Core insights
When troubleshooting GPU Running Hot? Causes and Temperature Optimization, start with the simplest, highest-impact checks: monitor GPU temperature, fan speed, clock behavior, and power draw under a repeatable workload. Then shut down the system, remove dust from filters, heatsinks, and fans, and confirm that cool air enters the case while warm air exits efficiently.
If temperatures remain high, reduce unnecessary heat output before replacing hardware. Set a sensible fan curve, cap frame rates where practical, and test lower power limits or a modest undervolt. These changes often preserve performance while reducing noise and thermal stress.
Only after airflow and software settings are ruled out should you inspect cooler contact, thermal paste, or aging fans. Treat unusually high temperatures, sudden spikes, or fan rattling as warning signs, and address them before sustained use causes instability or component wear.


